Amateur (Ham) Radio "Go-Box"
The best way to describe a go-box is a complete amateur radio station in a box. There
are many examples where this has been achieved, but usually the biggest issue is the
power source and the associated weight. In other words, batteries are not light.
The easiest solution to this issue is to have the batteries, if used, external to the
actual go-box itself. One method which is appealing is to use a battery box. In particular,
a battery box intended for marine use (with small electril trolling motors).
My "Go-Box"
Here are pictures of the Amateur (ham) Radio "go-box" I built to be able to
have a complete station in a box. Well almost. An external DC power source may be used,
and for this I have a marine battery box containing an Optima "Red-Top" battery. (This is
not shown.) I also do not have any antennae in the go-box as yet. For mobile use, I simply
carry along some magnetic mounted antennae.
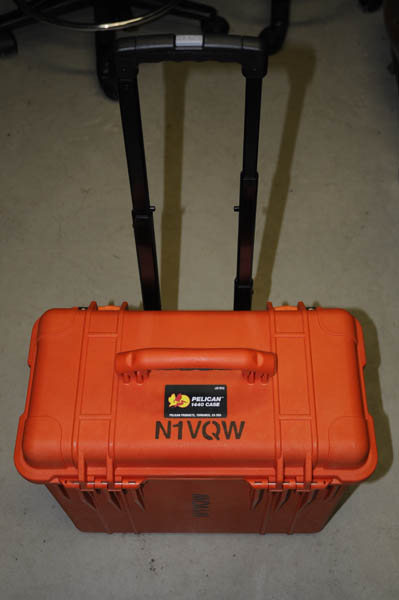
The go-box is built to fit into an orange Pelican 1440NF case. I chose orange because
I wanted it to stand out, and be visible. (I stenciled my call sign on the case so it was
easier to identify. I chose a Pelican case because of their reputation for being just about
indestructable; as well as water resistant/proof.
This particular case was used because it was the smallest one which would hold all the
equipment I wanted to include. In addition, one of my design goals was to be able to operate
in a vehicle, so having everything in a vertical orientation works well. It is a simple
matter to remove the insert and place it on a table for a more conventional horizontal
orientation.
One note on the hardware. Because I had a ready supply, I used (almost exclusively)
stanless steel hardware. While this offers added protection against moisture, it probably
isn't really necessary.
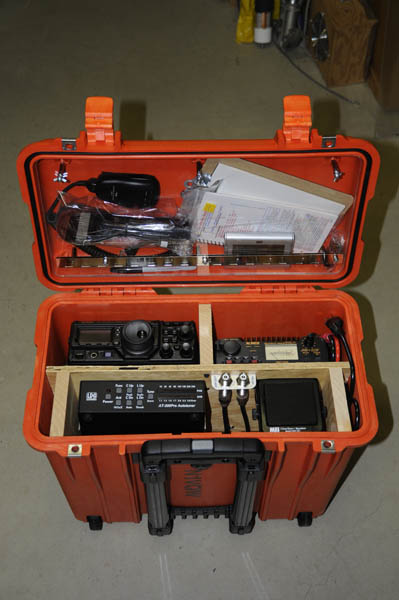
The go-box contains:
- Alinco DM-330MVT 5 to 15 VDC 30A switching power supply.
- LDG AT-200Pro 5 to 200w antenna tuner.
- MFJ-133RC 12/24 hour dual time LCD atomic clock.
- MFJ-281 Cleartone speaker.
- Nifty-897/D mini-manual.
- West Mountain RR/4005 5 outlet 40A RIGrunner.
- Yaesu FT-897D HF/6m/2m/70cm, all mode, tranceiver.
- Clipboard, pad of paper, and a pen.
- Microphone extension cable. This allows you to operate much further from the
go-box than the stock coiled microphone cord would allow.
It is rather simple, but it gets the job done.
|
Here is the complete case, ready to go:
|
|
|
Here is the go-box, open for business:
|
|
|
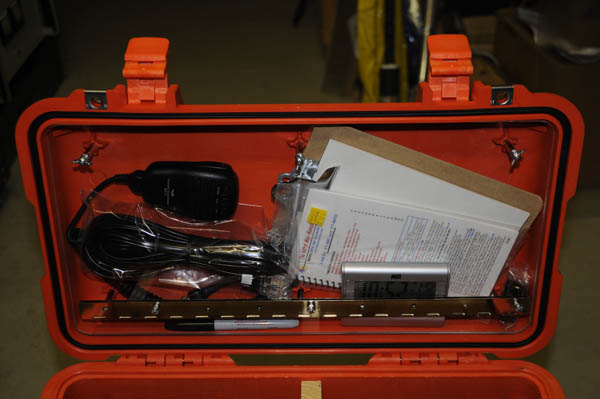
Here are the microphone and extension cord, clock, clipboard, pen, and manual stowed for travel:
The cover in the top is clear acrylic, attached with a "piano" hinge. This hinge is
attached to 1.25 inch long (1/4 inch) standoffs. The wing-nuts used to keep the cover in
place are also visible.
|
|
|
Here are the AC and DC power connectors. The AC power cord pulls out of the case and may
be plugged into a convenient outlet or extension cord. The DC connector is a 75 A Anderson
PowerPole connector.
|
|
|
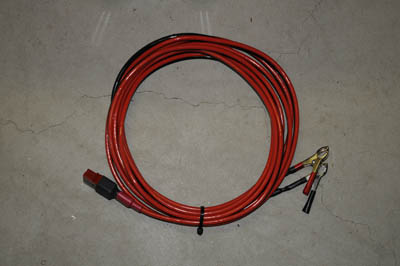
I made up an extension cord to be able to connect the go-box to any convenient battery for
a power source. I also have a shorter cord to connect the go-box to the battery box.
|
 |
|
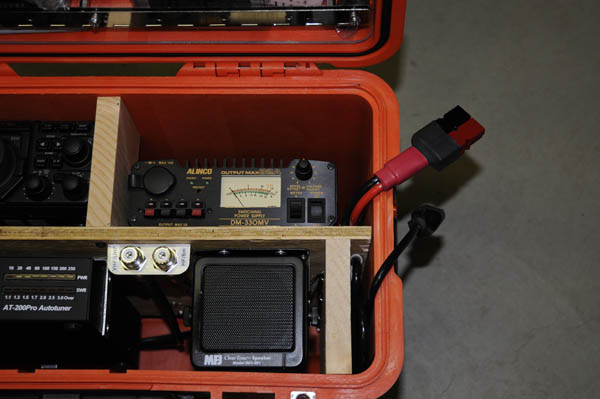
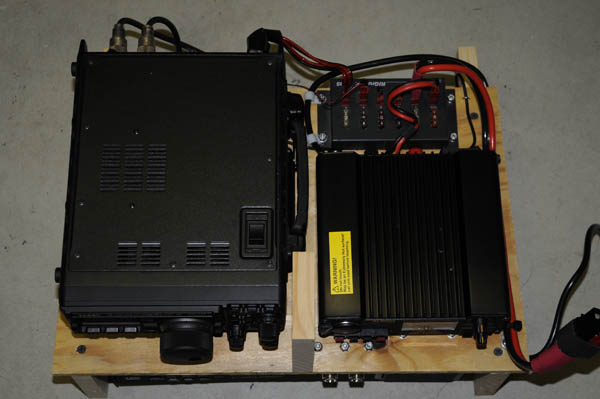
Here is a top-view of the insert, showing the FT-897D on the left and the Alinco power supply
and RIGrunner on the right.
The piece of wood mounted between the radio and the power supply is necessary to
prevent the insert from moving around in the case.
|
|
|
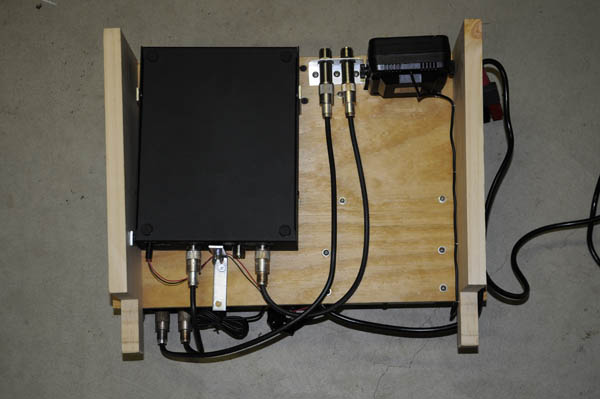
Here is a bottom-view of the insert, showing the LDG tuner on the left and the MFJ speaker
on the right. In the center is an aluminum angle bracket holding the HF/6m and 2m/70cm antenna
connectors.
There is even some room to mount more stuff behind the speaker.
The notches on the ends of the side supports are needed to allow then to not interfere
with the wheels of the Pelican case.
The sides of the insert are tapered because of the shape of the Pelican case.
|
|
|
Here is the view of the back of the insert, showing the back of the Alinco power supply
on the left (with the RIGrunner below it) and the FT-897D on the right.
The 2m/70cm antenna connection (the right of the two) goes directly to the angle bracket
on the front of the insert. The HF/6m antenna connection (the left of the two) goes to the
antenna tuner and then to the angle bracket on the front of the insert.
|

|
There are a couple of improvements I may make in the future:
- Add a fan and some ducting to draw fresh/cool air from the front of the case to the back of
the case forcing out the warm/hot air. This should prevent any heating issues.
- I am also considering modifying the top of the Pelican case to allow it to open and lay
flat when the case is in the vertical position. The big problem with doing this modification
is it would remove the ability for the top to stay open when the case is in the horizontal (the
collapsable handle on the bottom) position.
- Add an LED reading lamp, powered from the RIGrunner to allow easier use in low light (or
dark) conditions.
- Add wire antennae for HF/6m/2m/70cm to be contained in the go-box.